

Water Management: Part Two
Over time in this series of blog posts I will begin to expose you to the world of water management in residential construction.
At White Oak Homes we provide general contracting services in the Halton region. We are currently building an addition at a home just north of Milton, Ontario which we renovated last year. This year we have returned to build a 700 square foot single story + basement addition for this family. We are in our framing stage and as we have begun to prep the walls for the specified water management system we thought it would be a good idea to showcase the process of one of our methods for preparing a rough window opening to be integrated to the WRB (weather resistive barrier) of this new addition.
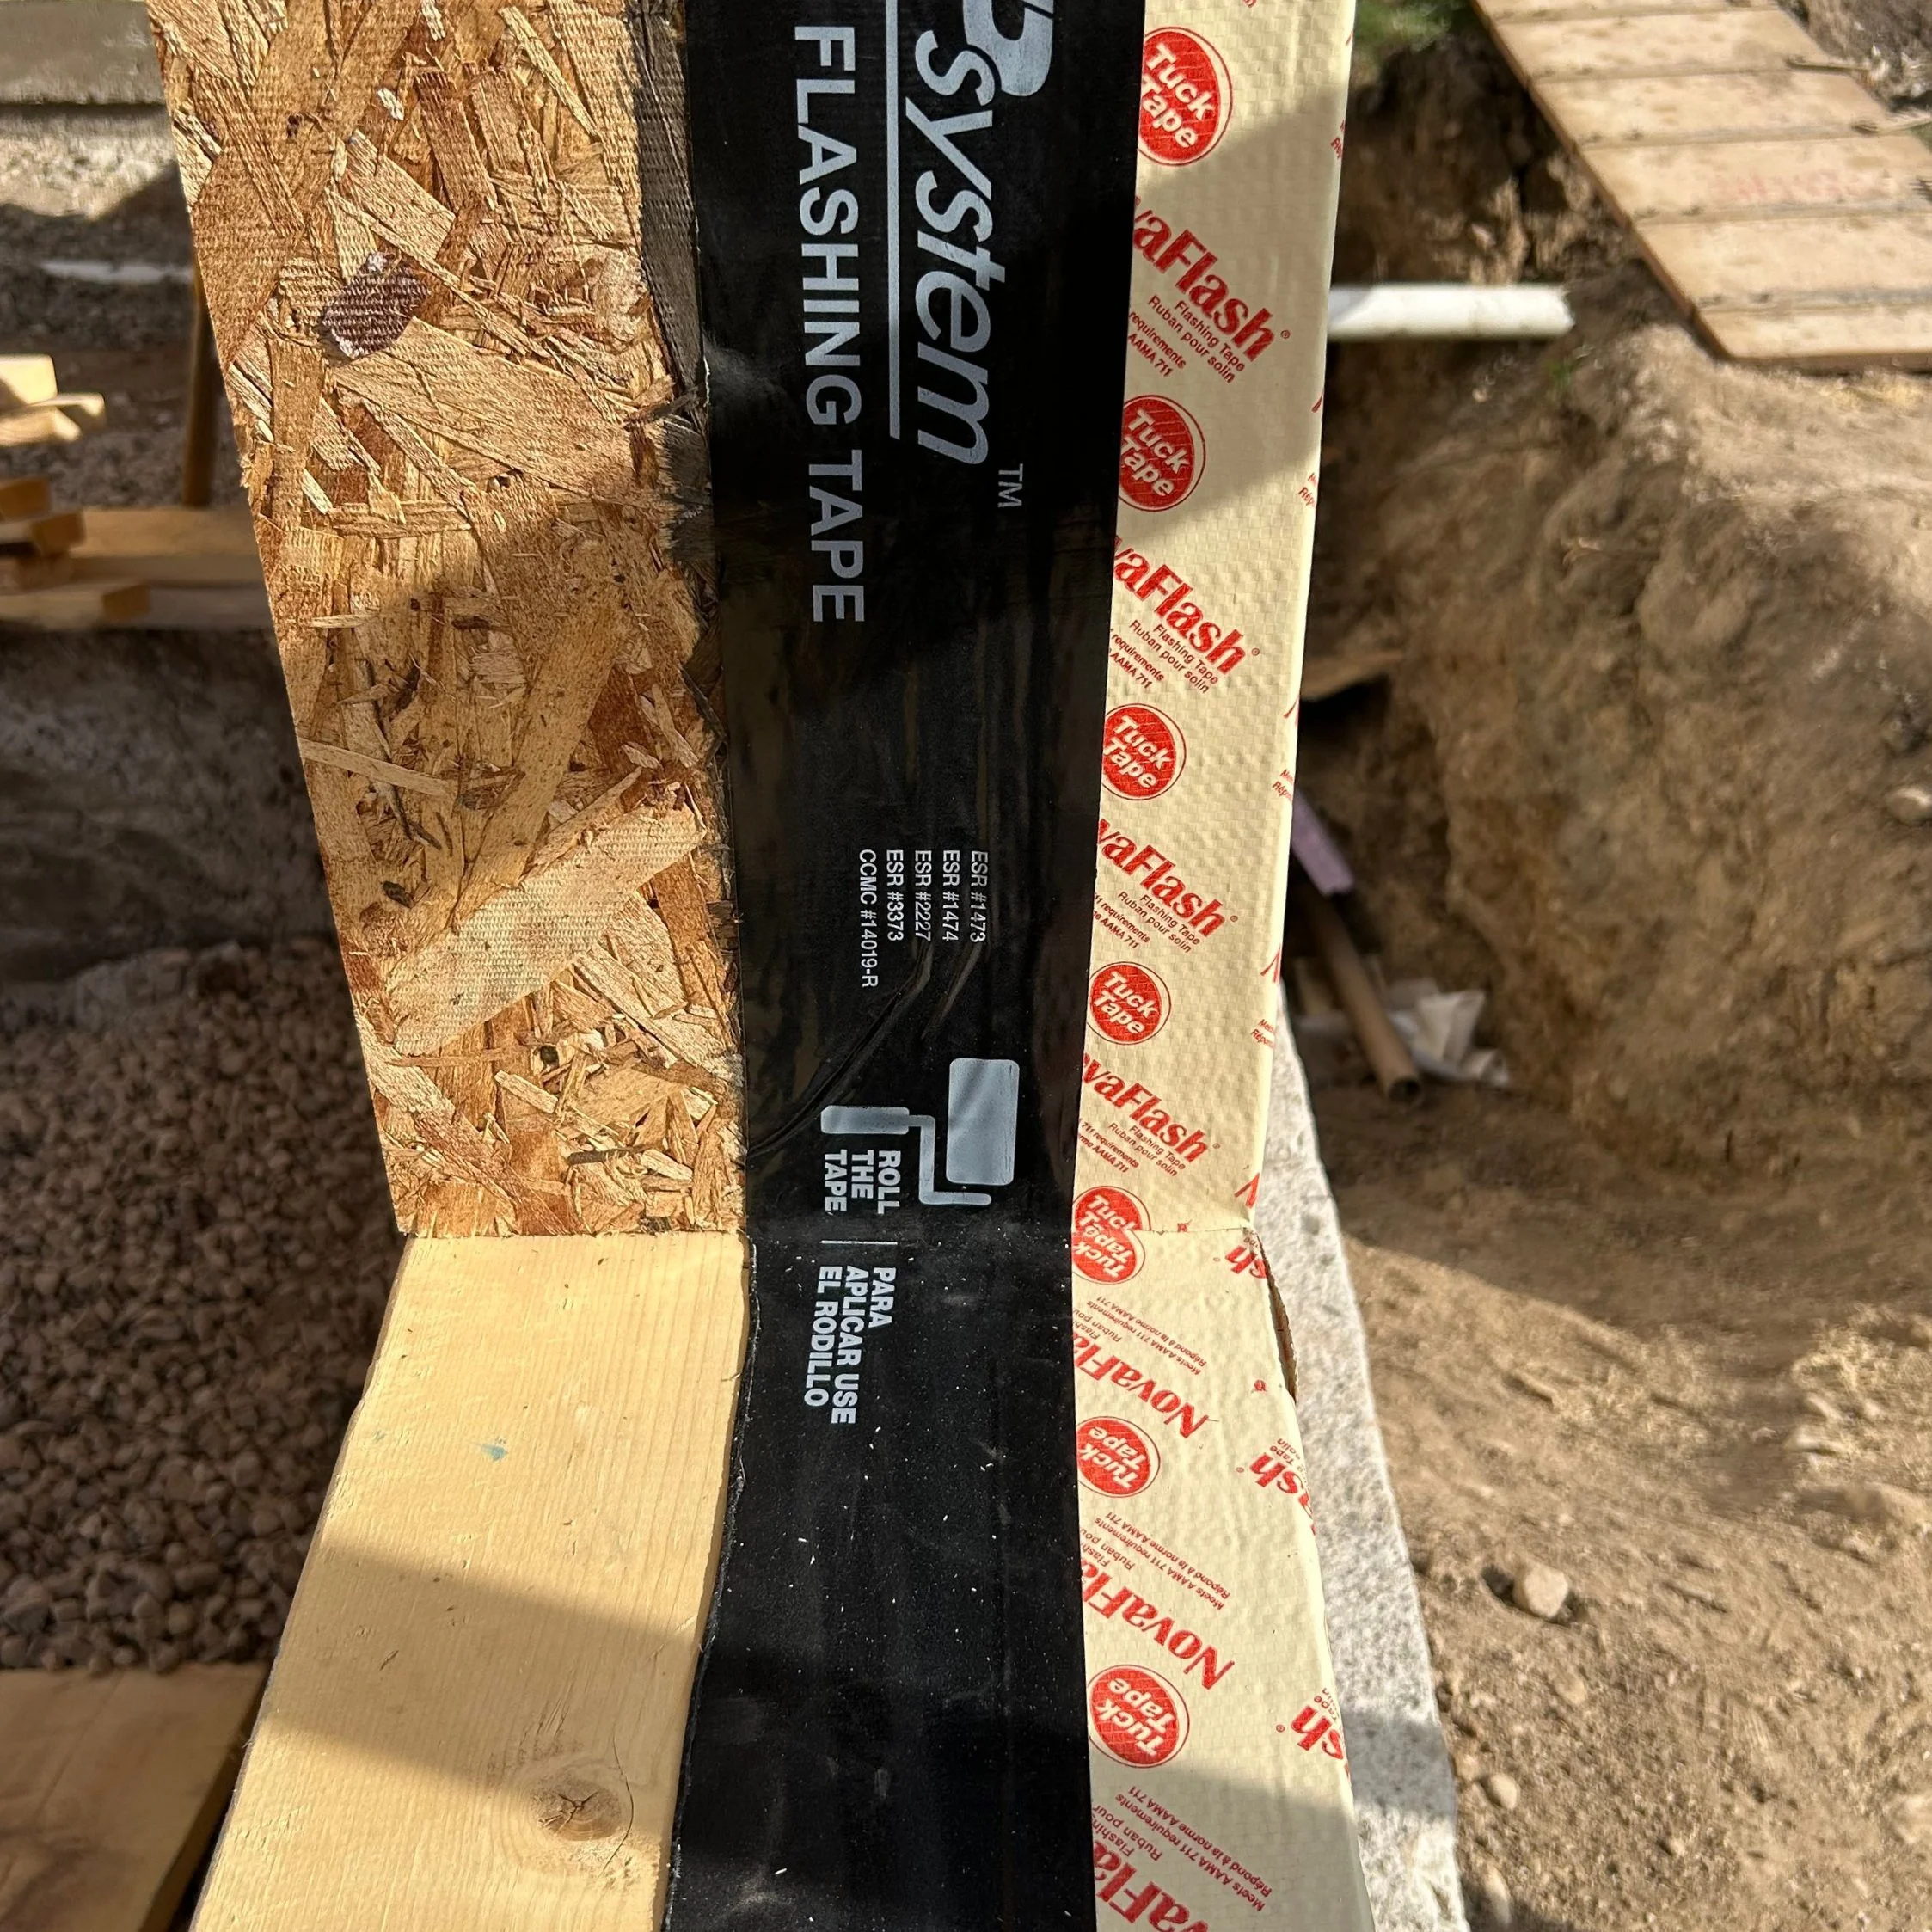
The system specified on the architectural drawings is a “mechanically fastened” system, in which a non-woven, breathable, polypropylene membrane is fastened to the wall bottom up with overlapped and taped seams which restrict the passage of bulk water, into the house but allow the for the passage of water vapour through the membrane to allow for some level of drying potential to the outside.
There are several ways to flash an exterior door or window correctly. And there are several more ways to do it incorrectly, and an incorrect system has the potential to cause catastrophic damage if unnoticed and unaddressed.
Our first step is one I see even well seasoned carpenters miss and it is a detail called out on the instructions of Typar flashing tapes.
This first step is to cut the WRB flush across the head of the rough opening and slice two small angled slits up and away from the window creating a “flap” and expose the raw wall sheathing.
The second step is to cut the WRB down the “leg sides” of the rough opening approximately 1” back.
If you have ever seen framers handle the WRB you may immediately notice that this is not what is typically done. It is more typical for framers to slice an X shape pattern through the window opening and fold the WRB into the rough opening.

Following these steps, the WRB above the head of the opening is folded up and out of the way, which makes room for a flashing tape to be bonded to the face of the sheathing and folded into the rough opening. As a general rule, whenever possible any water management layers should be installed “shingle-style” meaning from the bottom, up. With each subsequent later lapping onto the previous.
That being said, the flashing tape begins at the bottom with a sill pan.
How far any given flashing detail goes depends on budget and environment. There is room for consideration from project-to-project depending on the demands of the house, the client and the environment we’re building in. These products perform well when applied correctly, but they are not inexpensive, which means in a case like our current wall in question we began wrapping the entire sill, but the 2x10 wall framing was going to consume a lot of material. So the client asked if there was a lower cost system and we changed course, slightly as you will see later on.

We pay special attention to maintain “shingle-style” lapping practices and redundant layers in the most vulnerable locations such as corners and transitions.
Where we cut the WRB 1” back from the edge of the rough opening in the second step we lap our tape over the WRB and adhere it to the exposed sheathing and fold into the rough opening on the leg sides. This is also a practice that is recommended by some manufacturers. In the event that water should find its way behind the WRB, the tenacious bond of the butyl or acrylic tapes will act as a dam, preventing water from traversing into the opening below the protective layers in the right wind conditions.
In the photo above you can see our change of plans. We opted for a less expensive tape we had on hand to wrap our 2x10 rough openings only as deep as the window unit itself. This saves nearly 5” worth of material around the perimeter of every window in this wall.
Given that the sill is not completely protected, a simple detail is to roll up the inner most edge of the tape to about 1/16” - 1/8” to create a small “back-dam”.
In the event water finds its way onto the sill beyond the window, this dam will act as a barrier preventing the water from intruding into the house, and it will be forced out through draining or drying. Either way, the sill framing and the interior of the home are adequately protected.

Close up shot showing how we use the sill pan flashing tape to create a small back dam to prevent water intrusion into the house, should water make it beyond the outboard layers onto the sill in the rough-opening.
The next blog posts in this series covering flashings from our Milton addition we will cover how to install and flash the windows themselves in a way that protects the house from water intrusion, promotes effective drainage and protects the vulnerable areas, and we will cover important details around proper head flashing over windows and show you how our flap over the header integrates into that system.
Until next time, thank you again for your attention, your interest and hopefully your business! Please find the contact form on the website or email us directly at info@whiteoakhomes.ca or reach us by phone at 416-930-3724 if you are looking for a General Contractor in the Halton Region, specifically Acton, Georgetown and Milton we would love to provide you with our exceptional services.